Introduction
As your NetSuite environments are being updated to features for NetSuite 2022.1 release, we thought we’d highlight some of the new features that may be worth exploring.
SuiteAnalytics Workbooks Dataset Linking Now Available in UI
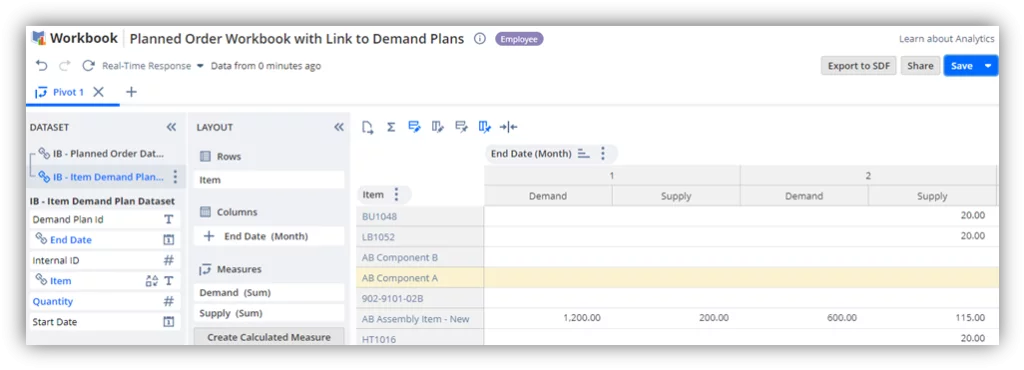
This is the novelty that we are excited about. If you are familiar with NetSuite’s workbooks, you would understand how difficult it was in the past to take two disjointed datasets and link them together in a Pivot table. Although, in the previous releases, you were able to join two datasets via scripting, not many NetSuite customers attempted it as it was too complicated and required considerable SuiteScript competence. In addition to this, users were also not able to group datasets by two attributes.
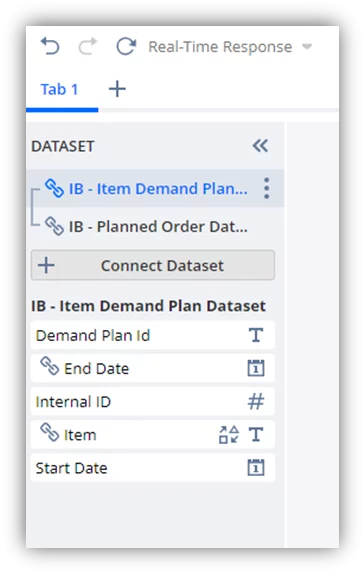
For example, if we have MRP planned orders and we wish to connect them to our item demand plans, we can now do it with the help of this new feature. (See our screenshots below).
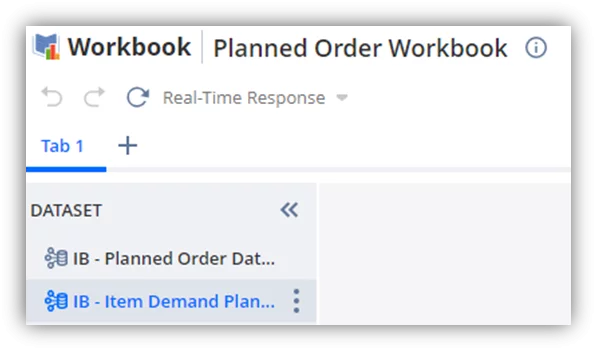
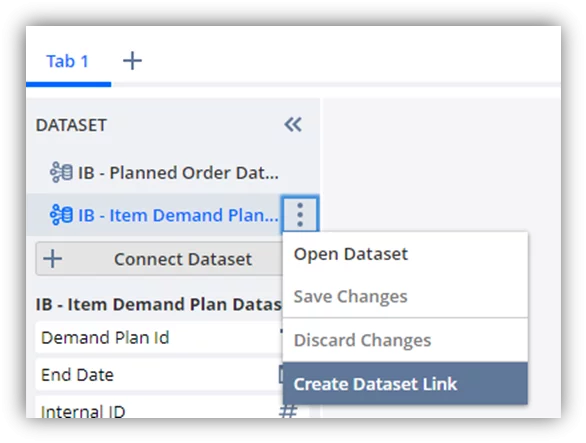
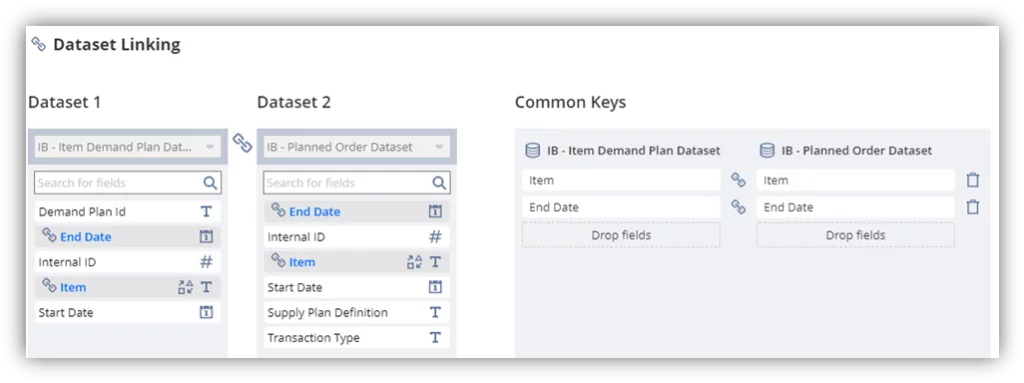
We can now turn these attributes into joins and proceed with Pivot building / grouping.
Supply Chain Control Tower Features for Netsuite 2022.1 Release
For those of you who use Supply Chain Control Tower, you will be happy to know that some Vendor Performance enhancements have been introduced in features for NetSuite 2022.1 release. Below are the steps you can perform to test this functionality.
1. View and calculate vendor performance KPIs:
Go to Lists > Supply Chain > Review Vendor Performances (Administrator).
On this page, you will select the Vendors for which you want NetSuite engine to calculate an assess risk of late purchase order receipt / late arrival of shipments.

2. Review Recommendations:
Next, go to your ‘Control Tower Dashboard’ (Lists > Control Tower Dashboard).
You will see NetSuite’s alerts in the Predicted Risks portlet.
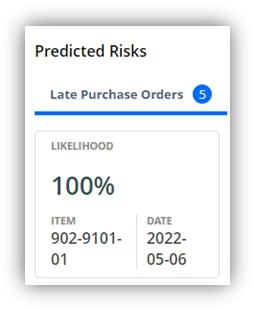
Click on the title that you wish to investigate further. On the next screen you will see all PO lines that may be late along with NetSuite recommendations.

In our example, the order is 16 days late. By switching the Vendor (i.e.: ACOM Business Solutions), we can expect earlier delivery (based on predicted days late / early setting on the ACOM vendor record).


To simulate the delivery on the Supply Chain Snapshot, we will click on [Add Recommendation to Snapshot] button.
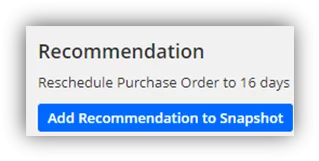
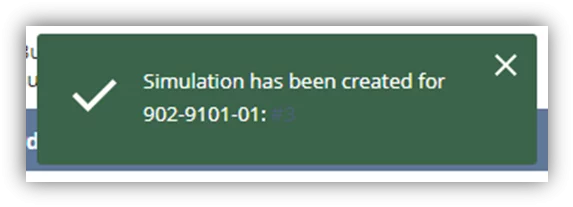
When we view the Snapshot, we can see the ‘Simulation’ line that was created by NetSuite, and it’s clear that we will receive our product 16 days earlier based on our Vendor ACOM’s performance history.

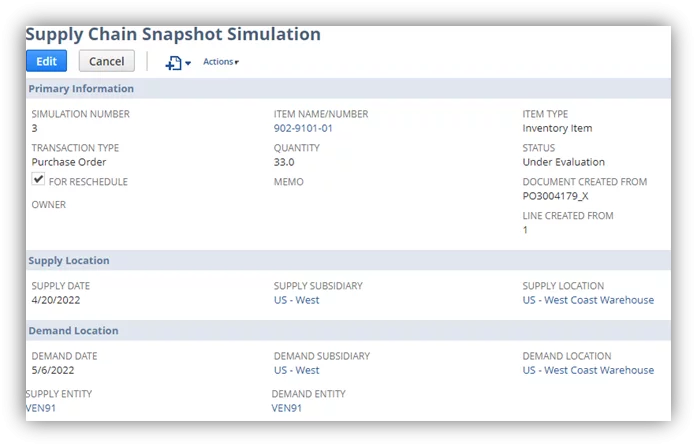
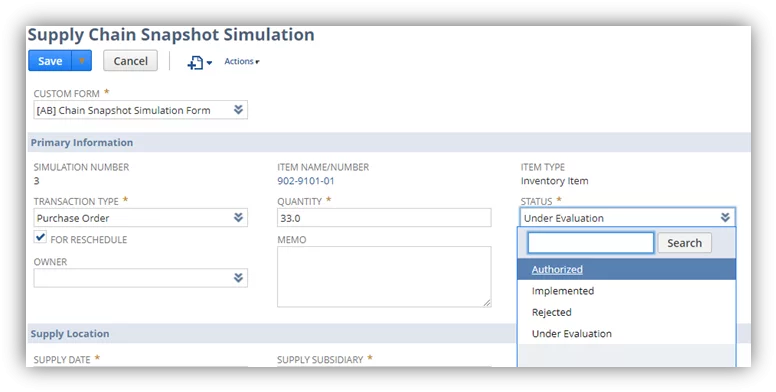
Next, the purchasing manager will authorize the simulation, see the screenshot below.
When the recommendation is followed, it will disappear from the ‘Supply Chain Predicted Risks’ page.
Read more about the Benefits of NetSuite Release 2024.1 for CFOs.
Discover the Full Potential of NetSuite's Latest Features!
Ready to leverage these enhancements for your business success? Contact AlphaBOLD today for expert NetSuite solutions. Explore NetSuite's new capabilities now!
Request a Demo3. Add System Notes to your Dashboard:
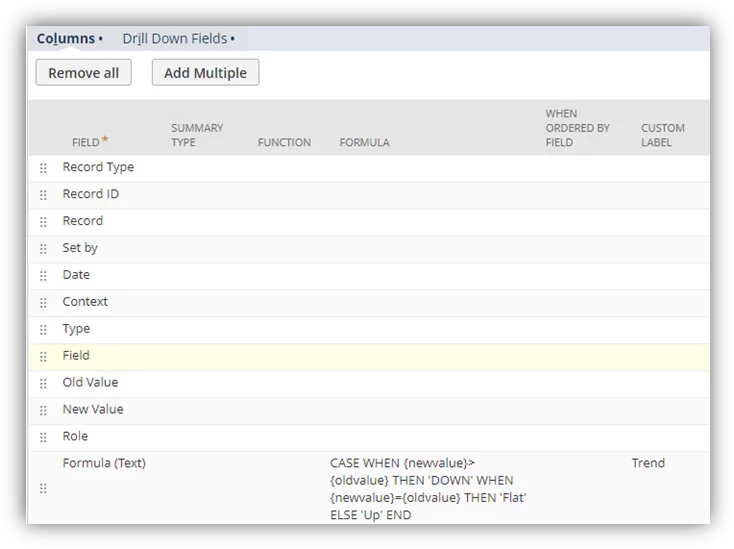
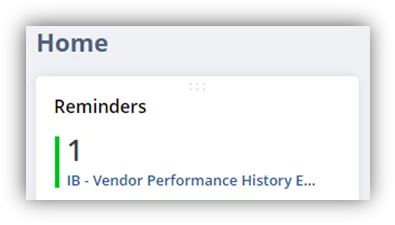
NetSuite included vendor performance data in its system notes. This means that you can now create a saved search reminder / alert from system notes and add it to your Dashboard.
See our example below.
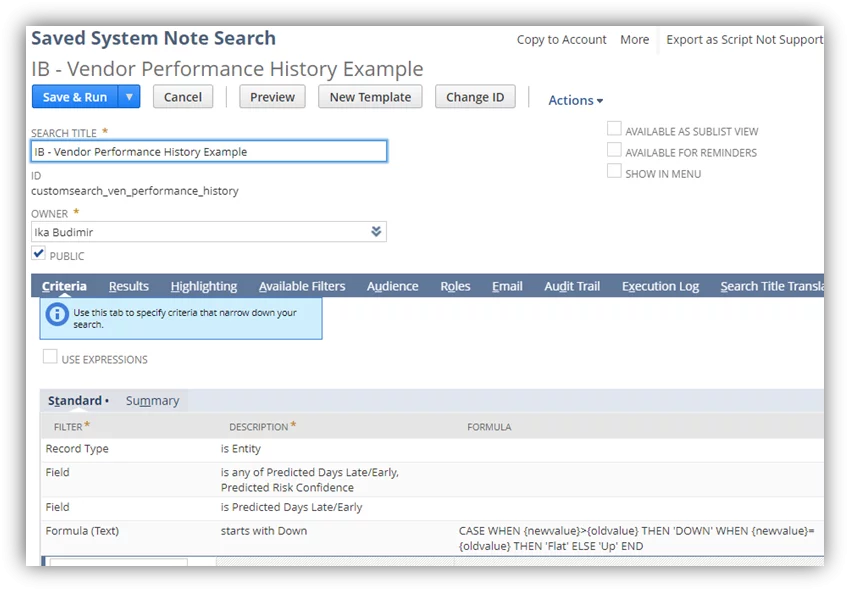

4. Review Vendor Delivery Performance Scores:
The final enhancement can be observed directly on the Purchase Order. You will now see the [Get Predictions] button, each time you create a PO. The button should help you see the Vendor Score.

Note, when we were testing this functionality, we encountered the following message.
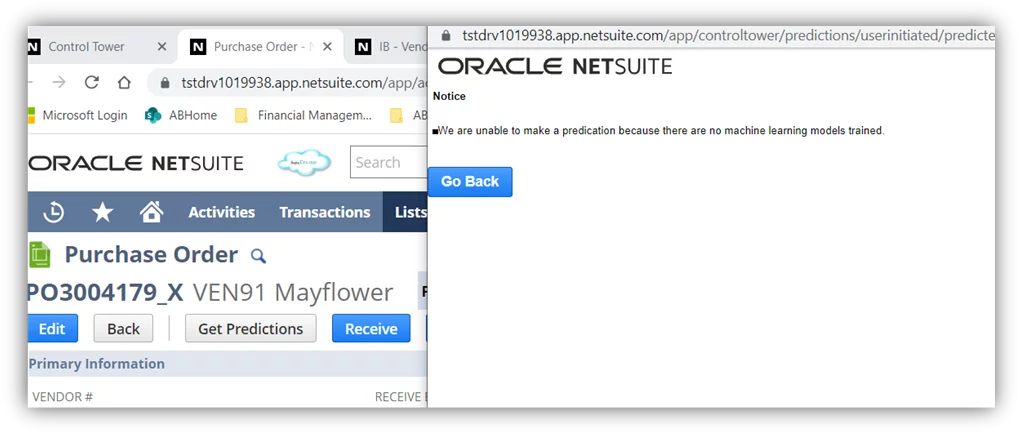
When we spoke to NetSuite about this error, they said that for each Vendor there needs to be a considerable number of (PO) transactions, before the AI component of this solution can be properly trained. As with everything new, this latest enhancement is still being perfected, so do expect to face some issues in the first couple of releases.
Read more about 3 Great New SCM Features in NetSuite 2019.2.

User Guide for NetSuite Pricing: All You Need to Know
All you need to know about NetSuite pricing! Explore our user guide for comprehensive insights.
Download Guide
Invoice Presentation Template
The Invoice Presentation Template (IPT) SuiteApp provides project-based businesses with the ability to present data in multiple formats through invoice presentation templates.
1. Installation:
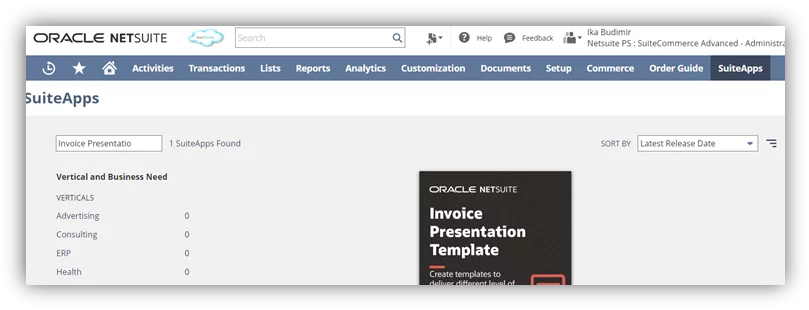
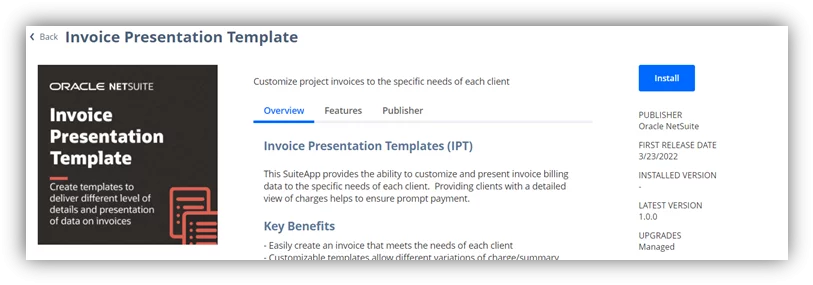
You can simply go to your ‘SuiteApps’ tab, look it up in the search and click on Install button when ready.
2. Preference Setup:
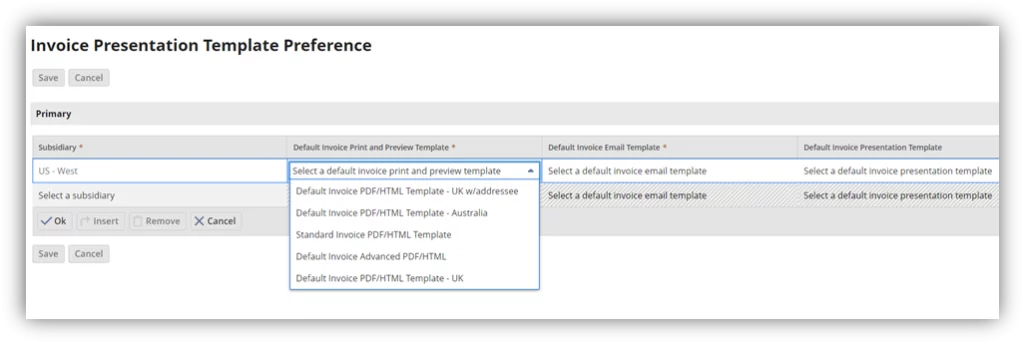
Next, go to Transactions > Sales > IPT Preference (Administrator). On this page, you can define the templates for each of your subsidiaries (that is if you operate in OneWorld environment).
3. Create a Presentation Template:
Go to Transactions > Sales > Invoice Presentation Templates > New (Administrator).
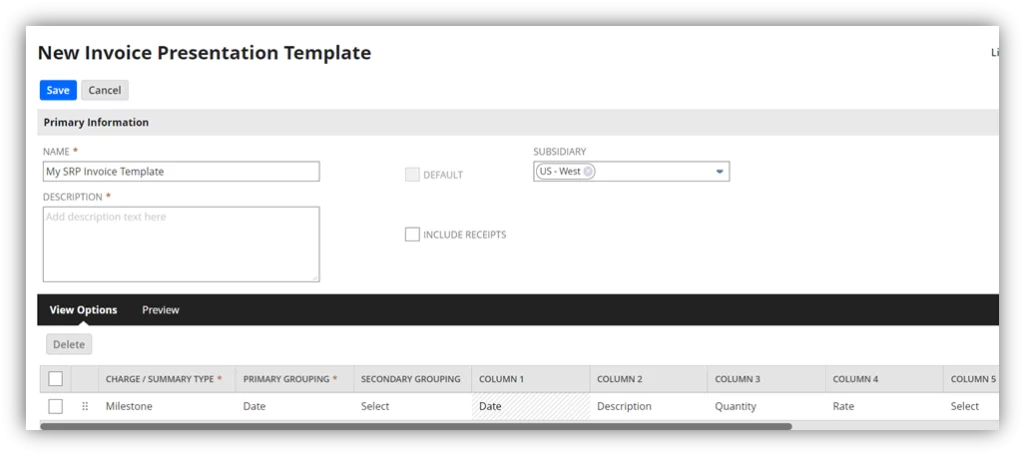
Note, on the layout you will map various project sections to your PDF layout, including the individual fields.
Looking to Leverage the Newest NetSuite Enhancements?
Partner with AlphaBOLD for expert NetSuite solutions and seamless integration. We have multiple years of experience that you can benefit from! Request your free demo today.
Request a Demo4. Assign the Template:
Through assignments, you will be defaulting specific template(s) on your Invoice transactions. The assignment is done on the Customer and Invoice records. See the images below.
Customer:

Invoice:

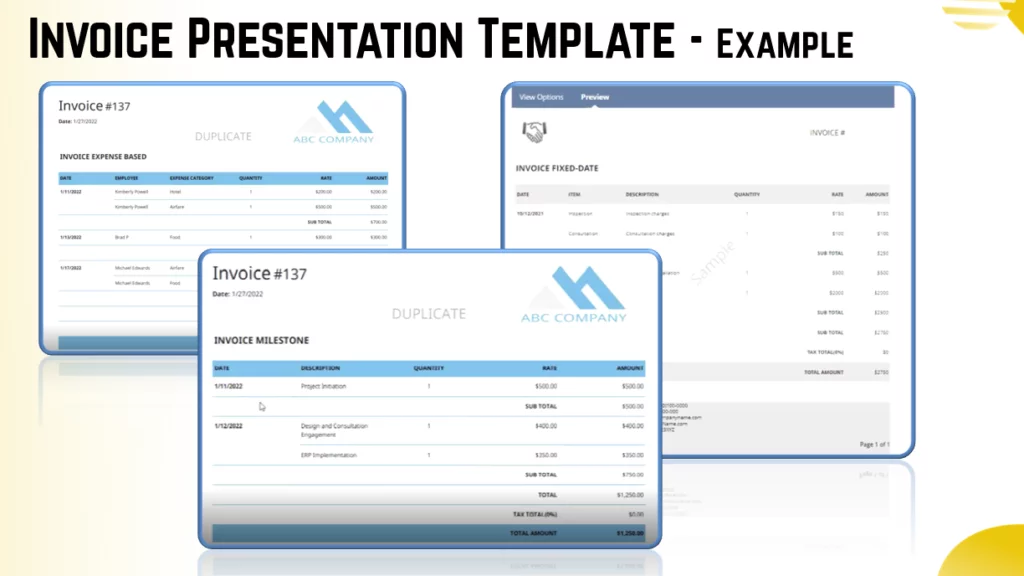
Once completed, the invoices will look like image examples below.
Conclusion
In conclusion, we enjoyed testing these new enhancements and we would love to discuss them with you. Should you have questions around how you can implement them in your environment, do not hesitate to contact us at [email protected]; we would love to talk to you!


